Online Survey Creation System
List of surveys
After logging in, the "Survey List" will appear. The folders are located in the left sidebar. By default, there is a folder called "All my surveys" and you can add as many folders as you need to group your surveys. Folders can be nested on multiple levels. Below the folders are "My Shares" and "Trash".
On the right side, the surveys in the currently selected folder are displayed in a list. By clicking on the "Actions" button next to the given survey, all the functions that can be performed on the given survey will be displayed. You can filter in the list by status, search in the title of the survey and scroll at the bottom. Even if you work with a lot of surveys, you can easily review them and easily organize them.
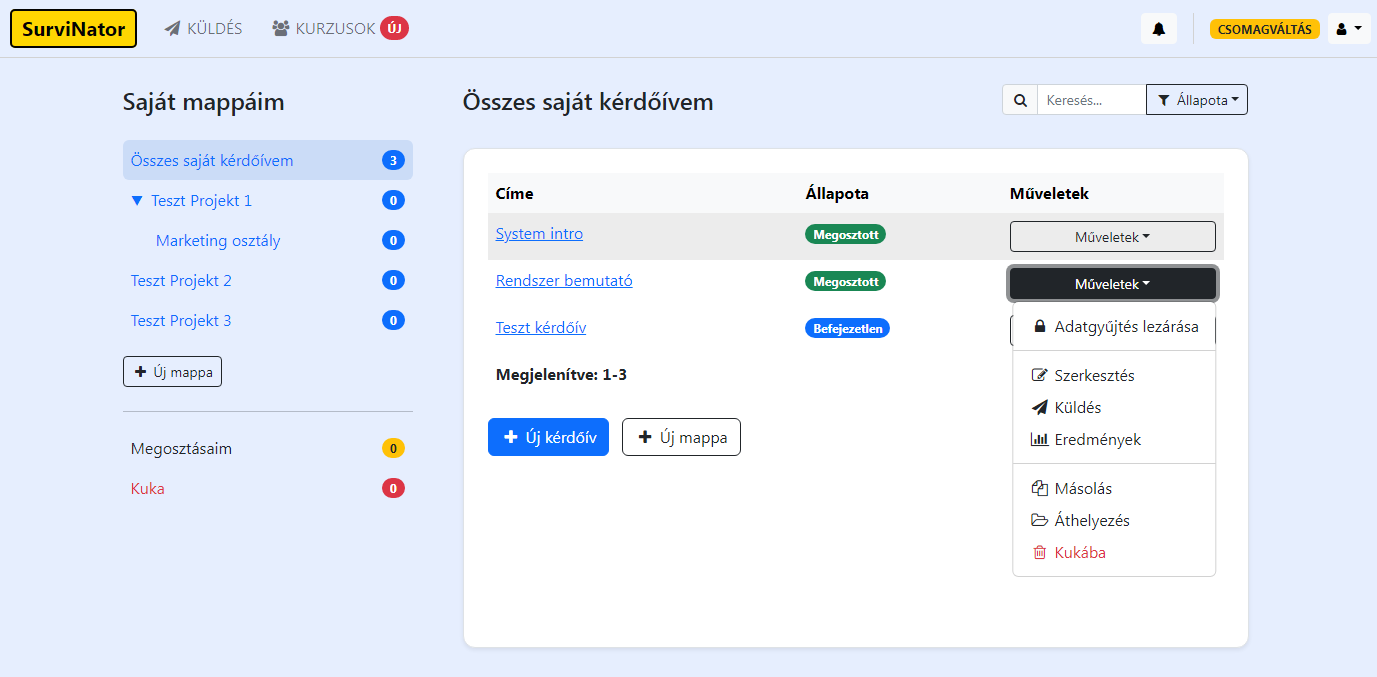
You can perform the following main functions here:
- Create a survey
- Edit, share, close survey, view, analyze, export collected data
- Copy survey (to the folder you specified)
- Survey placed in the trash, then permanently deleted
- Restore survey from Trash
- Organizing the survey into folders, moving between folders
- Create, edit, delete, share folders based on the specified permissions
- Invite collaborators
Edit survey
The editing interface of the surveys consists of the following main parts:
- Left edge of upper bar - you can go back to the list of Request Forms and see the title of the currently opened survey.
- Center of the upper bar - here you see the 3 main actions of the given survey, which you can easily navigate between.
- Right edge of the upper bar - the "Preview" button and the always visible User menu (Account, Contact, Logout, etc.)
-
Left menu bar - sub-menu items related to editing the given survey:
- Questions - here you can add new questions and edit, copy, delete existing ones, specify display and jump conditions. You can add your own pages and arrange the questions on each page.
- Appearance - here we have gathered all the settings that affect the appearance of the survey. You can also set the background, logo and color scheme, but also a lot of other things.
- Operation - We have divided all the settings into 3 categories ("1. Data management declaration (GDPR)", "2. Identification of the person completing it, protection", "3. Closure, redirection, notifications, other"), with which we can customize the behavior and operation of our survey.
- Texts - here you can modify all the wording of the survey in one place, you can also add your own languages and enter the corresponding translations here.
- Conditions - between the function buttons that appear above each question, there is a crossed-out grain, by clicking on which you can specify when the given question will appear. As a result, a "Condition" is created, which you can edit here. Here you can see all the conditions and enter more complex settings.
- Scoring - here you can turn it on so that the given survey works as a "Test". If you turn this on, you can assign numerical values to the individual answer options, based on which the system can perform an automatic evaluation. This is how you can create quizzes, tests, exams.
- Center of page - the content of the selected menu item on the left is displayed here.
- Lower right corner - system feedback (Error messages, Successful save, etc.)
Hovering the cursor over each question displays the actions that can be performed with the question. By clicking the Edit button, a panel will slide in from the side, where you can enter the type, title, description, answer options and other properties of the question.
Share Survey
If we have finished editing our survey, click on the Send button on the Edit page in the top bar in the middle or in the list of Surveys among the Actions of the given survey.
Before sharing the survey, the system will ask for confirmation, because after sharing, you will no longer be able to change the type of questions. Apart from the question type, you can change everything else at any time on the fly. It is advisable to review the survey using the Preview function before starting to fill it out. After approving the sharing of the survey, the following sending options will appear:
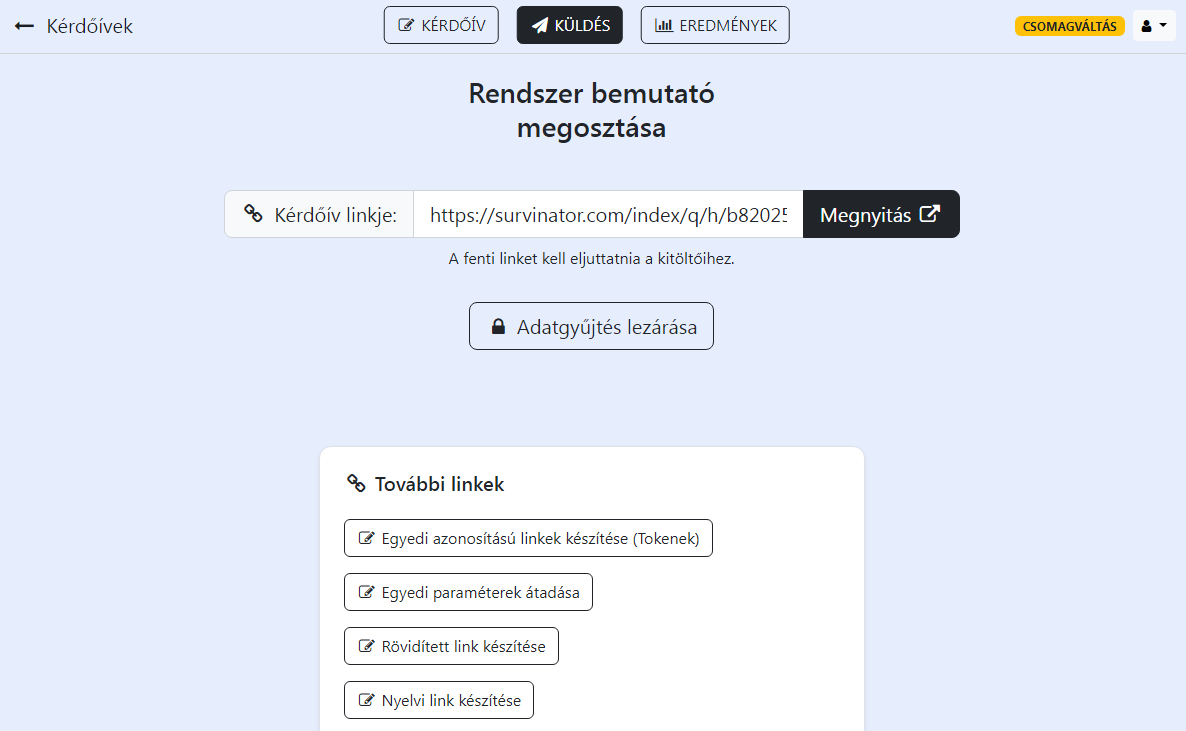
- Survey link - here you will find the direct link to fill out the survey. You have to somehow convey this to your potential contributors.
-
Additional links - in addition to the general link, you can create additional links by providing different information:
- Creation of uniquely identified links (Tokens)
- Pass custom parameters
- Create a shortened link
- Creating a language link
- Social sharing - You can post a message on your Facebook and Twitter pages with the click of a button, which contains the link to fill out the survey.
- QR-code - you can download it, place it on your website or copy and take the link of the survey's unique QR code.
- Placement on your own website - you can even embed a video or place a link with any text, clicking on which opens the survey that can be filled out.
- Send by e-mail - you can send the survey link from the system in the form of an EMAIL/SMS message either at a time or immediately. The system can also provide a number of click statistics.
- Print survey - click here to display the printable version of the survey.
Analysis of data collected by survey
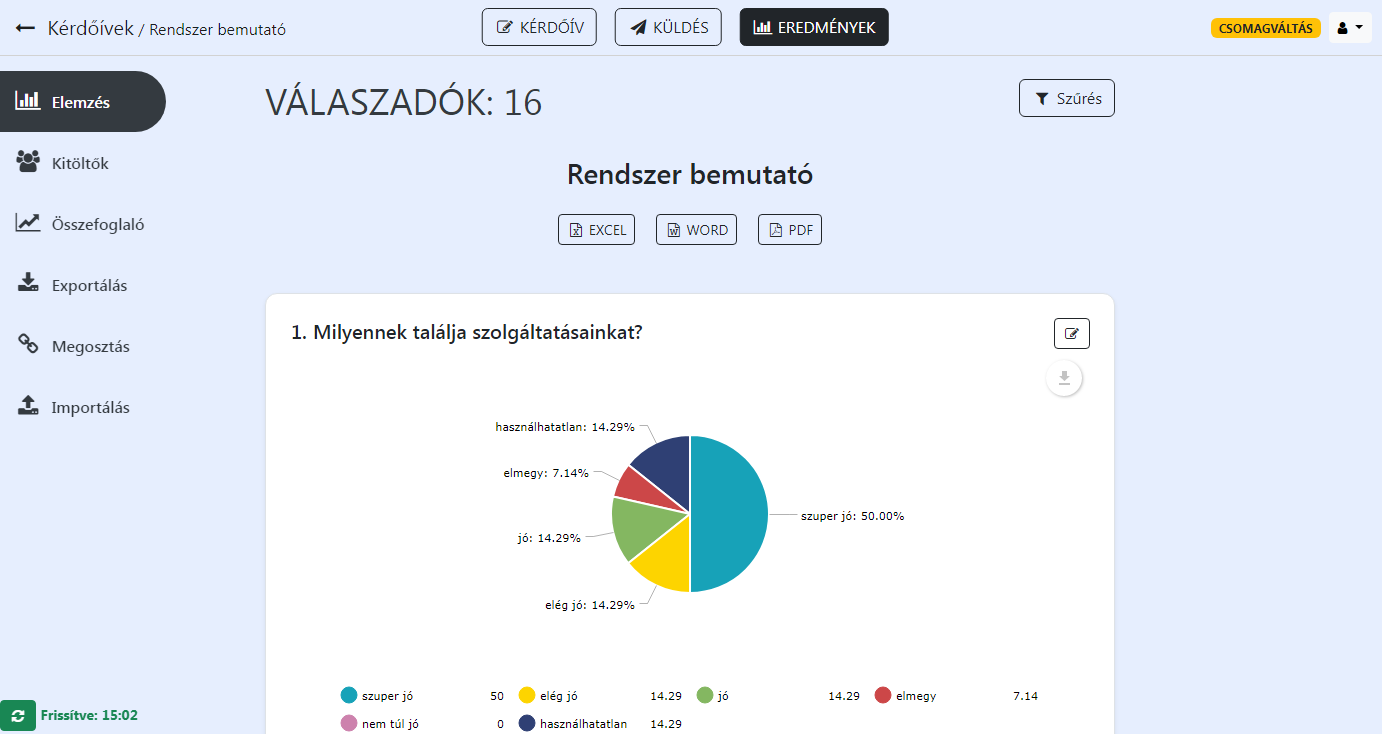
If we have started sharing our survey, the system will continuously receive the submitted data, which you can view immediately on the "Results" interface. The Results page has a similar structure to editing the survey, only here there are analysis-related menu items in the left-hand bar:
- Analysis - here the system displays the data grouped by question. For each question, it shows a diagram that you choose based on the type of question. It also displays the data in tabular form below. By clicking the edit button in the upper right corner of each question block, a panel slides in from the side where you can customize the individual elements, for example the type of chart, which you can choose from 16 different chart types.
- Fillers - you can see the general information of each filling in tabular form: Date, Country, City, Source, Token, Parameters. You can view individual answers, edit, print and delete them. You can also see how much time the individual respondents spent on each question.
-
Summary - here the system displays summary charts for:
- About source information
- About the average time spent on each question
- About the daily development of fillings
- About countries
- About counties
- About cities
-
Export - here you can download/view the results in different formats:
- EXCEL - full
- EXCEL - grouped
- WORD - grouped
- PDF - grouped
- HTML - full
- HTML - grouped
- SPSS numerically encoded data file (UTF-8 encoding)
- Syntax file loading SPSS labels (UTF-8 encoding)
- Sharing - this can save the parameters specified for certain exports and create sharing links for them, for which you can specify the start and end of access, so you can deactivate the link at any time and they will no longer be able to access the data.
- Import - with this function, you can load data from an excel file into the system en masse, which you can then further analyze and create graphs.
Automated EMAIL/SMS sending
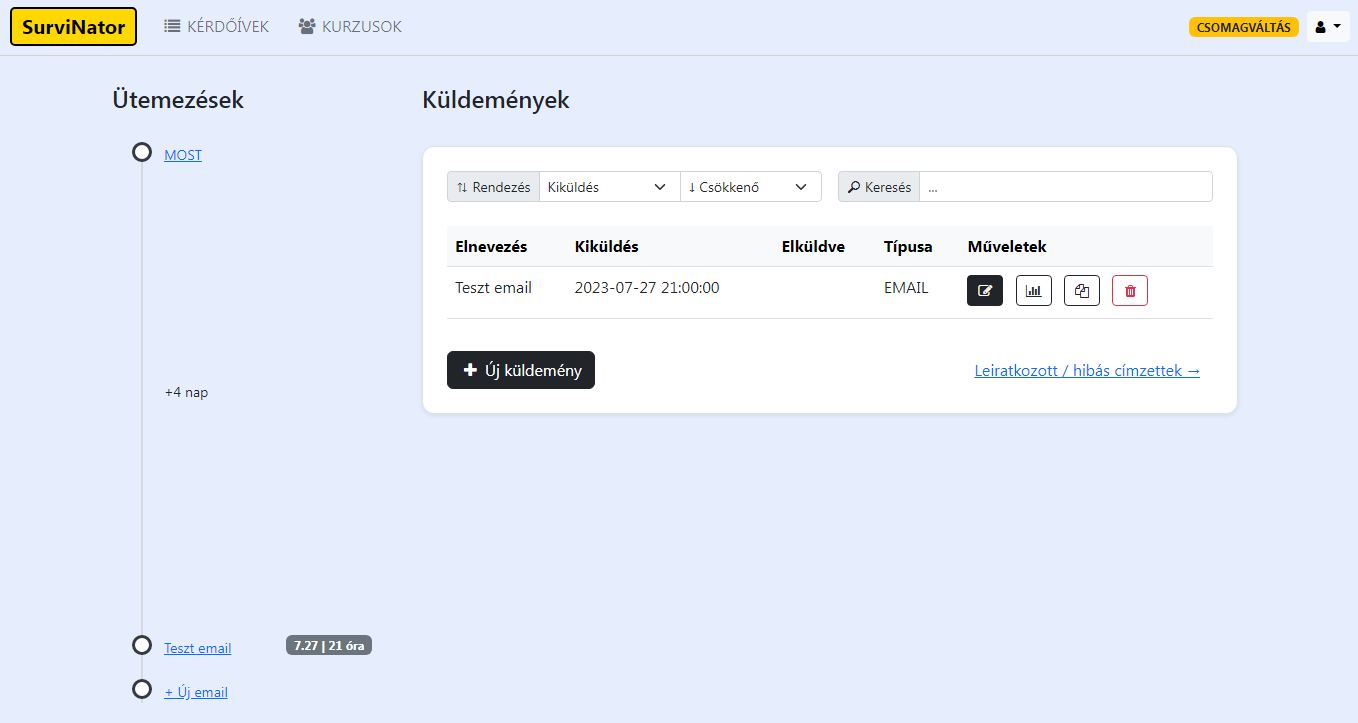
Here you can pick up shipments and send them out immediately or even schedule them in advance. The system also supports two types of sending: EMAIL and SMS. For e-mails, you can set up your own e-mail server, so it's as if you were sending it from your own e-mail. There is no cost for sending an email. Sending SMS is done by an external service provider, so it costs extra.
The List of messages consists of two parts. In the left-hand side bar, you can see the individual scheduled shipments together using a timeline. The system displays it in a list in the middle. You can search and sort the list. You can perform the following operations with individual shipments:
- Edit - can be modified before sending.
- Copy - you can copy it with one click, so you can easily create a new one based on the previous ones.
- Statistics - only available for sent shipments. You can see Who?, When? and How many times? started and Who filled in? the survey. You can also see the entire dispatch list, the data of which you can download in excel format.
- Delete - permanently deletes the shipment and all its click statistics.
When editing posts, the following options are available:
- Type - choose from two types: EMAIL, SMS.
-
Enter recipients - two methods are possible:
- New recipients - in this case you can specify the recipients permanently.
- Previous recipients (based on conditions) - in this case, the system compiles the recipients based on your previous shipments, in accordance with the specified conditions. For example, you can specify that last week's mailing should only go out to those who did not fill out the survey.
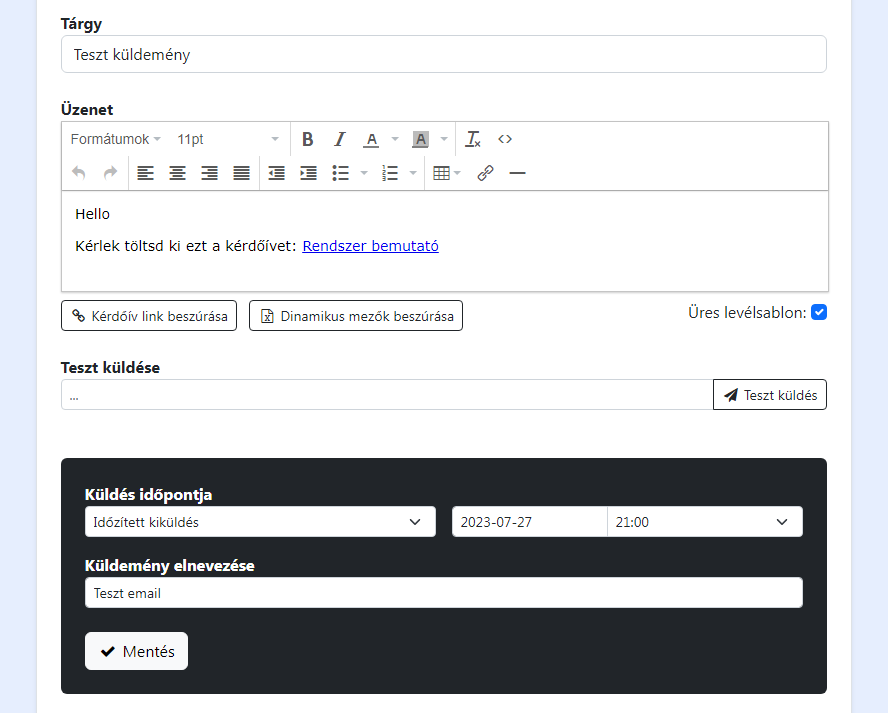
- Insert survey link - you can choose which survey and with what text you want to insert it and the system will insert it at the current cursor position.
- Insert dynamic fields - you can import data from excel. This way, you can send even more personal messages, address the recipients, and pass parameters with different values to each recipient.
- Scheduling - you can specify a time in advance when you want to send it out and the system will send it out automatically.
Online exams, conducting courses
With the help of Online Courses, you can easily assess the knowledge of your employees or students. You can complete online tests, you can manage groups of participants. The Courses provide all the tools with which you can conduct a complex knowledge survey on the participants of a specified group. You can see all the information in an easy-to-understand way: accounts, participants, their tickets and results.
1. Create a course as a step.
- Title - you can give the course a title.
- Assessments - the final result of the course will be calculated from the results of the assessments. You can even record several invoices.
- Result formula - based on the formula given here, the system calculates how the final result of the course comes out of the results of the assessment.
- Text results - you can convert the final result of the course into text based on the set of conditions specified. Sample entry:
Start value - End value => Text result - Course link - If you want to create an information page for the course, enter the end of the course link.
- Description - this will appear on the course information page.
2. As a step, take the course's assessments.
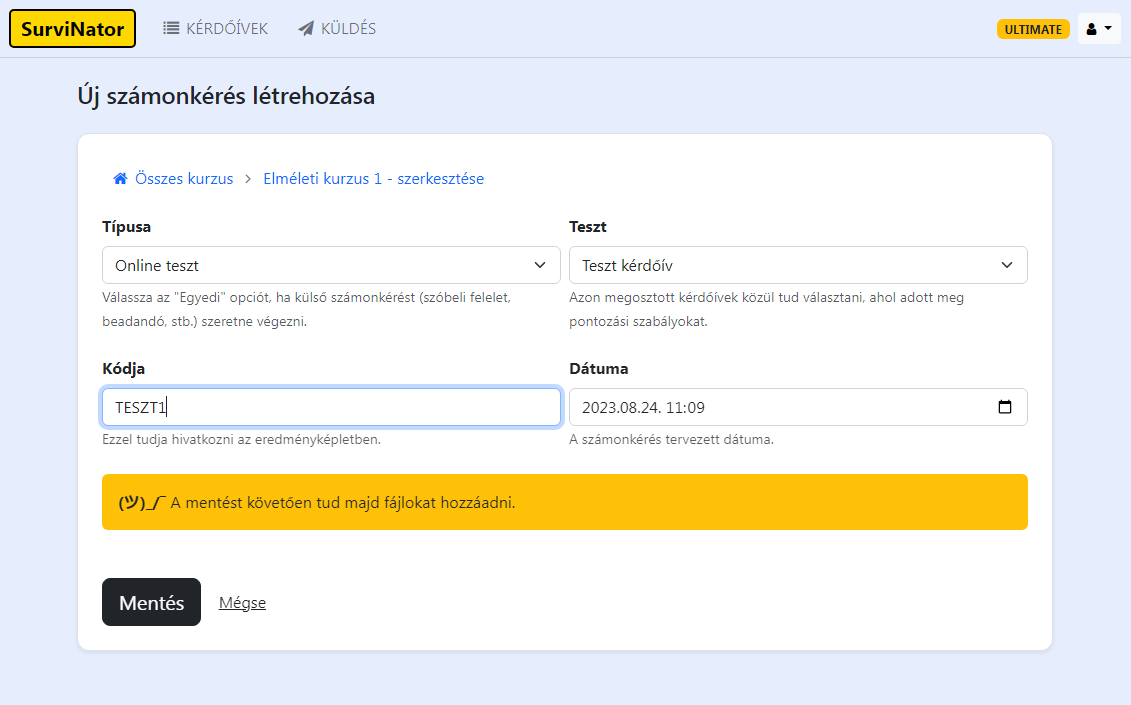
- Type - you can choose between 2 types: "Online test", "Individual". Choose the "Individual" option if you want to perform an external assessment (oral answer, submission, etc.).
- Test/Name - depends on the type you choose. In the case of the "online test" type, you can choose from the shared surveys where you specified scoring rules. In the case of "unique" type, you can enter a name.
- Code - you can refer to it in the result formula.
- Date - planned date of the accounting.
After saving, you will be able to add files and electronic learning materials.
3. Enter the course participants as a step.
You can enter the participants individually or en masse (from Excel), which will appear in tabular form after uploading:
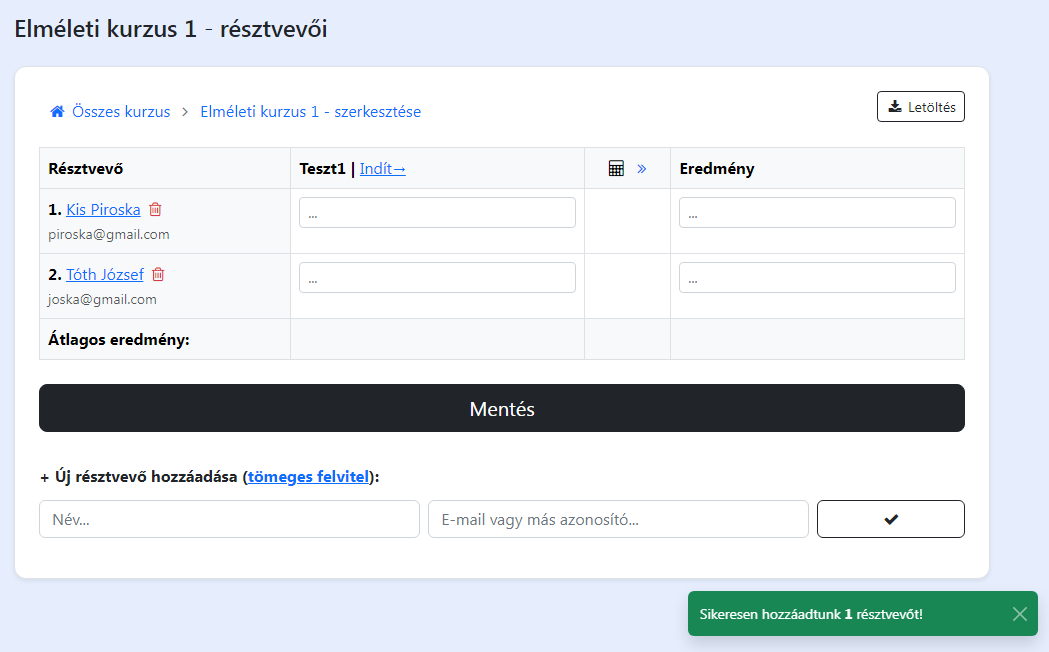
- Participant - the first column shows the participant's name and email address/ID, which can be changed by clicking on it. And with the help of the small trash can icon, you can delete the given participant.
- Invoice Requests - there will be as many columns as there are Invoice Requests. Below that, there is an input field for each participant, in which the results of each participant will be entered.
- Calculated result - this is automatically calculated by the system, from the results of the calculations, based on the specified "Result formula".
- Result - here you can record the results of each participant. With one click, you can raise the results calculated by the system, but you can also criticize them at any time. It can also appear in text below the numerical results, provided that you specified "Text results" when editing the course.
4. As a step, start the online test or fill in the results of the assessments.
If the type of Assessment was "Online test", you will find a "Start→" button next to the corresponding column in the Participants table. By clicking here, you can create access keys for the given online test for each participant. If the participant has been given an email address, he can also send his unique access link. You can see the current status of the given online test in tabular form:
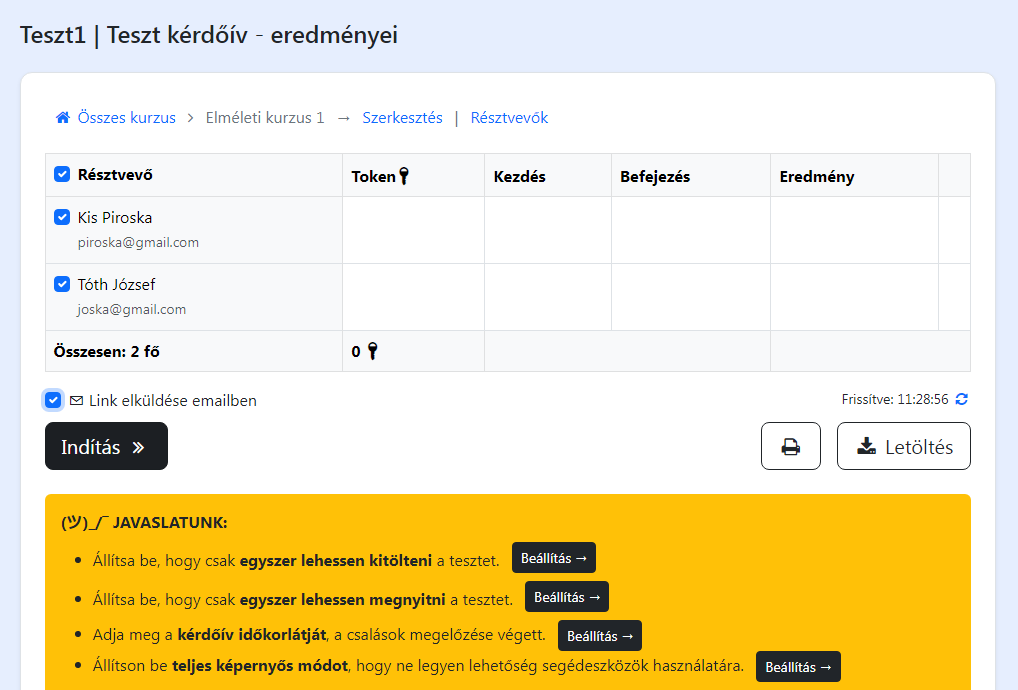
- Participant - in the first column, the participant's name and email address/ID.
- Token - unique access key for the test. There may even be several of these per participant.
- Start - this is when he started the test.
- Completion - this is when you finished, submitted the data.
- Result - the result of the test. You can view the answers given by the participant by clicking on the little grain button.
Using the buttons on the far right below the table, you can print and download the entire content of the table in excel format. At the bottom of the page, the system provides Suggestions, which are not mandatory, but it is worth setting them up. Next to each one you will find a Settings → button, which you can click to jump directly to the corresponding setting option.